How to install McMonagle Stoneer Cladding
Natural Stone Cladding Made Easy – DIY Installation Guide
McMonagle Stoneer Cladding is a 100% natural stone system designed to replicate the look of full-thickness stone at just 30mm depth. Suitable for both interior and exterior applications, it offers a lightweight, cost-effective, and easy-to-install solution for transforming walls and facades.
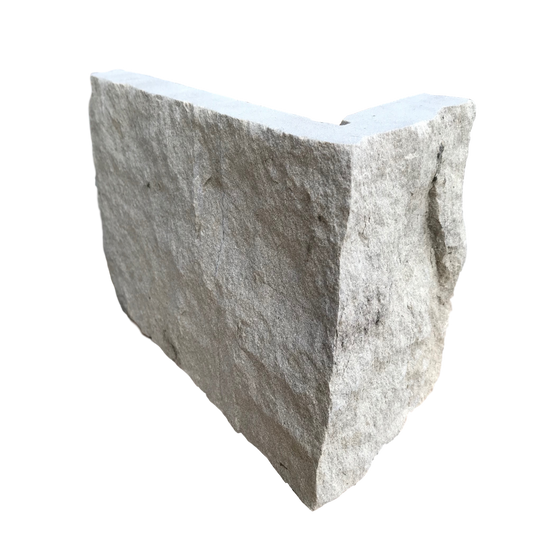
Available in a range of premium materials including Quartzite, Sandstone, Slate, and Limestone, Stoneer cladding is supplied in flat pieces and L-shaped corners, ensuring a seamless and professional finish
1. Estimating Materials
Flats (Wall Area)
To calculate the amount of flat stone required:
- Measure height × width of the area
- Subtract openings (windows, doors, etc.)
- Total = required coverage in square metres (m²)
Flats are sold per m².
Corners
To estimate corner pieces:
- Measure all external vertical corners (e.g. wall edges, window and door reveals)
- Total = required length in linear metres
Corners are sold per metre.
Adhesive / Mortar
We recommend Ardex X7G Plus Adhesive for installation.
- Allow approximately 1 bag per 3m² of flat stone
- For corners: multiply total linear metres by 0.2 to estimate additional bags
- Note: Usage may vary depending on stone type and substrate
2. Surface Preparation
New Blockwork
- No major preparation required
- Apply a scratch coat with water proofer (especially for chimney stacks)
Existing Surfaces
-
Remove existing finishes by:
- Sandblasting
- Water blasting
- Acid etching
- Wire brushing
- Alternatively, fix a metal lath and apply a scratch coat
Uneven or Rough Surfaces
- Apply a scratch coat to create a level base before installation
3. Installation Guide
Step 1: Pre-Application Setup
- Open multiple boxes and mix stone pieces for a natural blend
- Lay out stones to plan variation in colour, shape, and size
- Avoid clustering similar tones together
Step 2: Install Corner Pieces First
- Start at corners and work toward the centre
- Alternate long and short returns for a natural appearance
Application:
- Lightly dampen the back of each stone
- Apply approx. 10mm of adhesive to the back
- Press firmly onto the wall with a slight twist
- Remove excess mortar before it sets
Keep joints consistent and relatively narrow for best results.
Step 3: Fit Flats & Grout Joints
- Continue placing flat stones, filling gaps as needed
- Use smaller pieces to fill irregular spaces
Step 4: Final Cleaning
- Use a medium bristle brush to remove dust and debris
- Avoid excessive water during early curing stages
4. Pro Tips for Best Results
- Work in manageable sections
- Regularly step back to check alignment and variation
- Cut stones as required for a tight, professional fit
- Protect installed areas from heavy rain or frost during curing.
McMonagle Stoneer Cladding offers a fast, efficient, and visually striking way to achieve the look of natural stone walls. With proper preparation and installation, you can create a durable and timeless finish suitable for any project.
Related products
-
Mountcharles Sandstone Stoneer Cladding - Corners
Regular price €62,20Sale price €62,20 Regular priceUnit price per (Exc. VAT)Wasper Lin m -
Mountcharles Sandstone Stoneer Cladding - Flats
Regular price €64,10Sale price €64,10 Regular priceUnit price per (Exc. VAT)Was(€64,10 per Sq.m) -
Silver Donegal Quartzite Stoneer Cladding - Flats
Regular price €83,60Sale price €83,60 Regular priceUnit price per (Exc. VAT)Was(€83,60 per Sq.m) -
Gold Donegal Quartzite Stoneer Cladding - Flats
Regular price €66,90Sale price €66,90 Regular priceUnit price per (Exc. VAT)Was(€66,90 per Sq.m) -
Gold Donegal Quartzite Stoneer Cladding - Corner
Regular price €63,30Sale price €63,30 Regular priceUnit price per (Exc. VAT)Wasper Lin m -
Blue Limestone Stoneer Cladding - Corners
Regular price €67,60Sale price €67,60 Regular priceUnit price per (Exc. VAT)Wasper Lin mSold out -
Blue Limestone Stoneer Cladding - Flats
Regular price €70,30Sale price €70,30 Regular priceUnit price per (Exc. VAT)Was(€70,30 per Sq.m)Sold out -
White Limestone Stoneer Cladding - Corners
Regular price €73,90Sale price €73,90 Regular priceUnit price per (Exc. VAT)Wasper Lin m